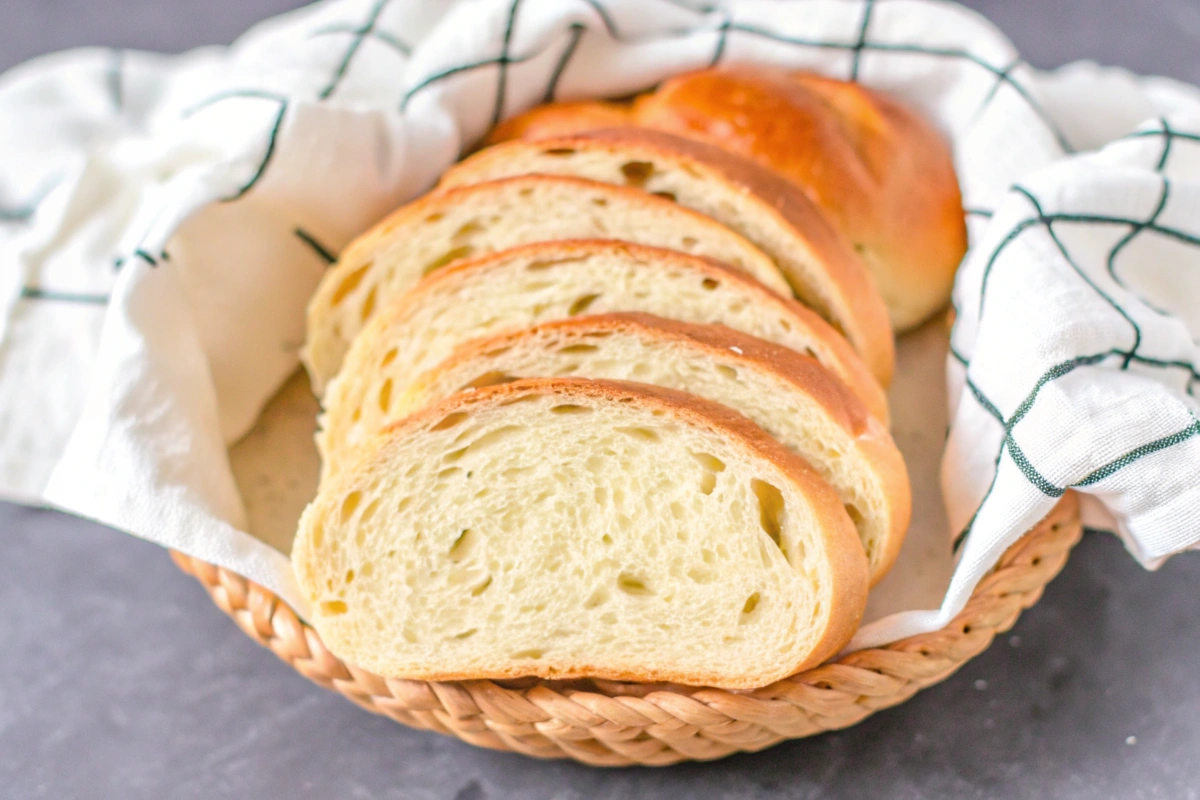
Imagine the warm, inviting smell of freshly baked Italian bread in your kitchen. It takes you back to lovely Tuscan vacations or cozy Sunday dinners with family. Homemade Italian bread is more than a recipe; it’s a way to connect with tradition and feed your soul.
Table of contents
Making traditional Homemade Italian bread is easy, even if you’re new to baking. Pair it with a warm, hearty broth for the perfect meal by exploring our guide on best soup bones for homemade broths, ensuring rich flavors in every bite.
Key Takeaways:
- The recipe consists of 5 simple ingredients: flour, water, yeast, salt, and a small amount of fat (butter or olive oil).
- Ideal proofing temperature for the dough is around 75°F (24°C), with an overnight proofing duration from 18 to 72 hours.
- The dough should typically double in size during rising, though this recipe produces a looser, bubbly dough.
- Baking temperature set at 450°F (232°C), with an initial 15 minutes covered and additional 20 minutes uncovered.
- Stretch and fold method is used to build gluten without traditional kneading, strengthening the dough effectively.
Ingredients Needed for Authentic Homemade Italian bread
The key to a authentic Italian bread recipe is in its ingredients. Choosing the right mix is essential for a great crust and crumb. Let’s explore the must-have ingredients for Italian bread.
Flour Choices
When it comes to Homemade Italian bread flour types, the flour you pick matters a lot. Bread flour, with 12-14% protein, makes the crust chewy and the gluten strong. On the other hand, all-purpose flour, with 10-12% protein, gives a softer crust and a tender crumb.
Adding high-gluten flour can make the bread even more elastic and textured. It’s a favorite for many traditional recipes.
Yeast Types
The best yeast for Italian bread depends on what you want. Active dry yeast, which needs to be soaked in warm water, is known for its strong flavor and good rise. Instant yeast, which can be mixed with dry ingredients, is convenient but just as effective.
Both types of yeast are used in about 1% of the flour, following traditional Italian methods.
Additional Ingredients
Other important Homemade Italian bread recipe ingredients include:
- 1½ teaspoons of sea salt, making up 1.5% of the flour, for extra flavor.
- 1 tablespoon of granulated sugar, about 1.4% of the mix, to help the yeast grow.
- 2 cups (480ml) of warm water, for 60-65% hydration, creating a crispy outside and soft inside.
- 2 tablespoons of olive oil, increasing to 5.7% for more moisture and richness.
- 1 large egg white and 1 tablespoon of cold water for an egg wash, making the bread golden and shiny.
Using these ingredients together makes your dough perfect for a crispy crust and soft inside. By knowing and using these high-quality ingredients, you’re on your way to making a traditional and tasty Italian loaf.
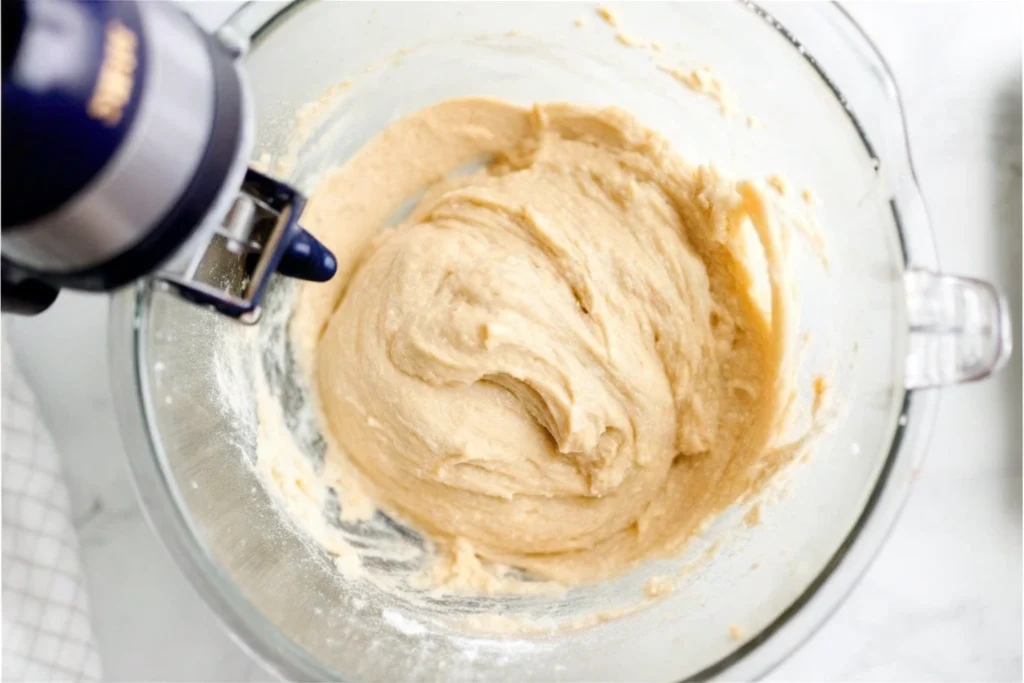
The Art of Mixing Dough
Mixing Italian bread dough is key to getting that perfect crispy crust and soft inside. It doesn’t matter if you’re using your hands or a machine. The goal is to mix all ingredients well without overdoing it.
Begin by mixing flour and water together. This starts the gluten development. Mix for about 3 minutes until the flour is fully wet. Then, let the dough rest for 15-30 minutes before adding salt and yeast. This step, called autolyse, makes the dough more stretchy and hydrated.
It’s important to keep an eye on the dough’s temperature. Mix for 3 minutes to avoid overheating, which can affect yeast activity. Add 50 grams of boiling water to 25 grams of flour to make a yudane. This helps the dough stay soft and last longer.
Mixing time without salt and yeast: 3 minutes; Resting time for dough before adding salt and yeast: 15-30 minutes; Maximum whisking time for the dough to avoid overheating: 3 minutes; Total prep time: 1 hour 55 minutes; Total baking time: 50 minutes; Total time from start to finish: 2 hours 45 minutes; Number of servings: 16 slices; Calories per slice: 95 kcal; Total flour used: 420 grams; Vital wheat gluten: 20 grams; Water content: 400 grams; Sea salt: 12 grams; Yeast (instant): 8 grams; Barley malt syrup: 10 grams.
- Hydration: Mix 25 grams of flour with 50 grams of boiling water to improve dough softness.
- Dough Stretch and Fold: Do this every 30 minutes to build gluten. Aim for 4-6 times.
- Initial Baking Temperature: Preheat to 450°F for 20 minutes. Then, reduce to 425°F for another 20 minutes.
- Nutrition: Each slice has about 95 kcal, 293 mg of sodium, and 20 g of carbs. It also has 5 g of protein, 0.4 g of fat, 4 g of fiber, 1 mg of iron, and 15 mg of calcium.
Learning to mix dough for Italian bread is essential. Don’t overwork the dough. By mastering these techniques, you’ll make a true Italian loaf.
Importance of Stretch and Fold Method
Learning the stretch and fold method is key in Homemade Italian bread baking. It helps create a strong gluten structure in bread, making the loaf light and airy. This method stretches and folds the dough gently, improving its elasticity and strength without hard kneading.
Developing Gluten Structure
The stretch and fold method builds a strong gluten network. Unlike kneading, it stretches the dough gently and lets it relax. This promotes the best gluten formation, leading to a loaf with great oven spring and an airy crumb.
Time and Technique
Timing is crucial in the stretch and fold method. You’ll do 3 to 4 sets, spaced 30 to 45 minutes apart. This lets the dough ferment slowly, building a strong gluten structure. Each fold should be firm but gentle, keeping the dough cohesive and elastic.
Visual Guide to Stretching and Folding
Here’s how to do the stretch and fold method:
- First Stretch: Lift one side of the dough and stretch it up, then fold it over the center.
- Second Stretch: Rotate the bowl 90 degrees and repeat the stretch and fold from another side.
- Third and Fourth Stretch: Keep rotating and stretching until you’ve done all four sides.
- Rest: Let the dough rest for 30-45 minutes before doing it again.
| Flour Type | Autolyse Duration | Desired Texture |
|---|---|---|
| Aged Whole Wheat Flour | 2+ hours | Softer |
| Predominantly White Flour | 1 hour | Extensible |
| Hand Mixing Dough | 15-30 minutes | Efficient Mixing |
| Pizza Dough | 10-20 minutes | Quick Mixing |
Using these Homemade Italian bread folding techniques saves time and makes a flavorful loaf. Mastering the stretch and fold method is key to making authentic Italian bread.
First Rise: The Overnight Method
The first rise Italian bread process is key to making your bread better. Using an overnight dough rising method lets yeast work slowly. This makes the bread taste better.
Letting the dough rise in the fridge for 2 to 24 hours helps flavors grow. The cold keeps the dough from getting too puffy. It also lets yeast work well, making the bread light and tasty.
Here’s a quick look at what you get from slow rising:
| Nutrient | Amount per Slice |
|---|---|
| Calories | 137 kcal |
| Carbohydrates | 25 g |
| Protein | 3 g |
| Fat | 2 g |
| Sodium | 242 mg |
| Iron | 1.5 mg |
Choosing this overnight dough rising method boosts the bread’s flavor. It also makes the dough easier to work with. This is perfect for those who want to make delicious first rise Italian bread without much effort. The dough will be ready the next day for shaping and the second proofing.
How to Shape the Dough
Shaping Italian bread dough is key to getting the perfect loaf. This guide will show you how to form the loaf. We’ll focus on making it even and symmetrical for the best baking results.
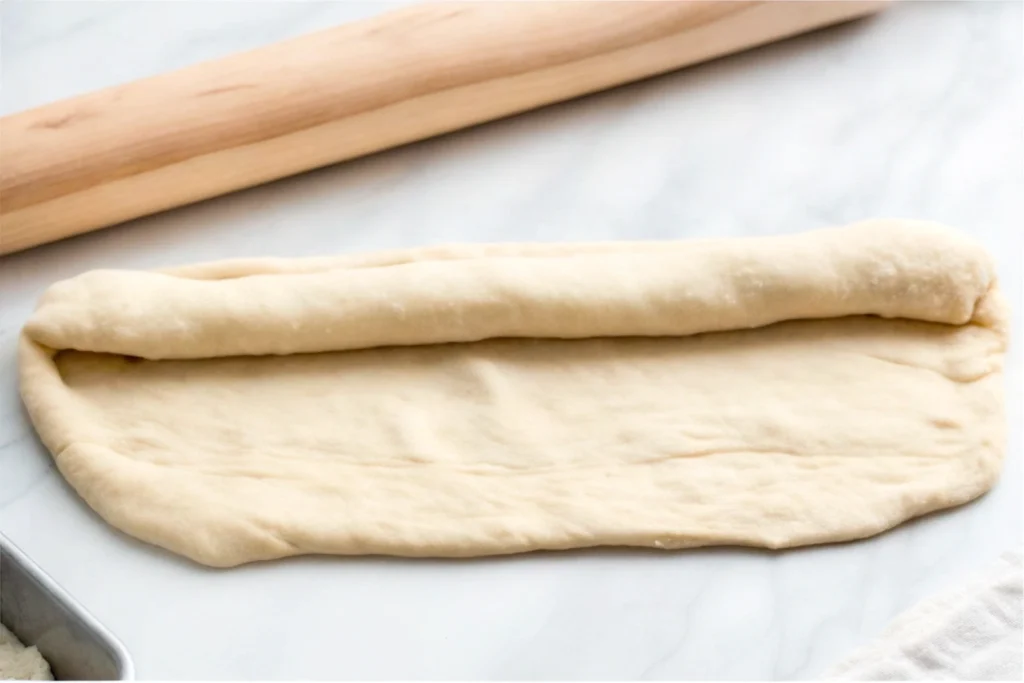
Forming the Loaf
Shaping Italian bread starts after dividing and preshaping the dough. First, air bubbles are pressed out to make the dough even. Then, the dough is folded like an envelope to create tension on the outside.
This folding makes the loaf smooth and cohesive. It’s crucial for a beautiful finish.
After shaping, let the loaf rest. This allows it to expand and fill out properly. For example, a honey whole wheat barley pan loaf, scaled to 1400g, proofs overnight in the fridge. This develops flavors and prevents a thick crust.
Ensuring Evenness
To make the dough even, consider its hydration and elasticity. Pan loaves can handle more water, making them easier to shape. A tight, smooth shape helps the dough keep its structure until baked.
Degassing is important for pan loaves. It removes excess air for an even crumb. Small buns or rolls rise in a pan until they reach the rim, helping them expand evenly.
During final proofing, dough should spring back slowly when poked. This means it’s proofed enough. Preshaped dough relaxes by about 30%, making the final shape smoother. Practice is key to mastering the art of shaping Italian bread loaves.
Second Proof: Getting the Dough Ready for Baking
The second rise Italian bread is a key step for the perfect size and fluffiness. You let the dough proof again before baking. This makes the bread light and full of volume.
- Size: The dough should double in size from its original shape during the second proof.
- Texture: Gently press the dough with your finger; it should slowly spring back, indicating proper fermentation.
- Visual Cues: The surface should appear slightly bubbly and swollen.
Here’s a comparative overview of different proofing times and methods:
| Method | Environment | Proofing Time | Temperature |
|---|---|---|---|
| Ninja Combi | Controlled | 45 minutes | 95℉/35℃ |
| Other Environments | Variable | 30-45 minutes | 95-100℉/35-40℃ |
By following these guidelines, you’ll ensure your dough is perfectly prepared for baking. This leads to a delightful end product. Remember, the second rise Italian bread is crucial in enhancing the bread’s texture and flavor.
The Role of Temperature: Proofing and Baking
Temperature control is key in bread proofing and baking. It helps get the right texture and crust. Knowing the best proofing and baking temperatures is crucial for tasty bread every time.
Ideal Proofing Temperature
The best proofing temperature for bread is about 85°F (29°C). Proofing times change with temperature:
- 1 to 2 hours at 80°F (26°C)
- 2 to 4 hours at 74-76°F (23-24°C)
- 6 to 8 hours at 46°F (8°C)
- 10 to 16 hours at 39°F (4°C)
Most home bakers use the fridge for overnight proofing. It’s around 39°F (4°C) for 10 to 16 hours. Yeast works best between 110°F and 130°F (43°C and 54°C). But it dies at 140°F (60°C) or more. To avoid overproofing, keep the temperature around 85°F (29°C).
Oven Preparation
Getting your oven ready is key for Italian bread baking. Each baking stage has its role:
| Temperature Range (°F) | Stage | Description |
|---|---|---|
| 80°–170°F (27°–77°C) | Gasses Formed | CO2 and alcohol vapor production begins. |
| 140°–212°F (60°–100°C) | Starch Gelatinization | Starches thicken the dough. |
| 160°–185°F (71°–85°C) | Protein Coagulation | Proteins solidify, forming the bread’s structure. |
| 212°F (100°C) | Water Boiling Point | Essential for leavening. |
| 320°F (160°C) and above | Sugar Caramelization | Leads to bread browning via the Maillard reaction. |
For doneness, lean-dough breads need 190–210°F (88–99°C). Enriched-dough breads are done at 180–190°F (82–88°C). By controlling temperature well, your Italian bread will rise right and have a crispy crust.
Italian bread recipe
Making traditional Italian bread at home is now easy with our simple recipe. This guide helps anyone make the best Italian bread with little effort. You’ll get results that look like they came from a bakery.
- 3 cups (426 g) all-purpose flour
- 1 tablespoon granulated sugar
- 1 tablespoon instant yeast
- 1 ½ teaspoons salt
- 1 ¼ cups warm water
- 2 tablespoons olive oil
Prep Time: 10 minutes
Cook Time: 15 minutes
Calories per serving: 144 kcal
Instructions:
- In a large bowl, mix flour, only 2 tablespoons of sugar, yeast, and salt.
- Add warm water and olive oil; mix until combined.
- Turn dough out onto a floured surface, knead gently about 5-6 times.
- Place dough in a greased bowl, cover, and let rise for 30 to 60 minutes.
After rising, shape the dough into a round or elongated loaf. Make sure it’s even. This helps your bread bake evenly. Serve it with a tender, flavorful protein by learning how to cook chicken very tender, creating a balanced and delicious meal.
Toppings:
- ⅓ cup bottled Italian salad dressing
- ½ teaspoon dried basil
- ¼ teaspoon dried oregano
- ¼ teaspoon garlic powder
- ¼ teaspoon salt
- Pinch of dried thyme
- 1 cup (113 g) shredded mozzarella cheese
- ¼ cup (28 g) freshly grated Parmesan cheese
To bake, preheat your oven to 450 degrees F. Brush the dough with Italian salad dressing. Then, sprinkle with herbs and cheeses. Bake for 15 minutes until the crust is golden and the cheese is sizzling.
Nutritional Information:
| Carbohydrates | 20 g |
|---|---|
| Protein | 5 g |
| Fat | 5 g |
| Saturated Fat | 2 g |
| Cholesterol | 7 mg |
| Sodium | 374 mg |
| Fiber | 1 g |
| Sugar | 1 g |
This easy Italian bread recipe is simple yet yields a superior loaf. It’s a mix of tradition and convenience. Each bake is consistently delightful and authentic.
Baking Techniques for a Crispy Crust
To get a perfect crispy crust on your Italian bread, you need to use special techniques. These methods will help you bake crispy Italian bread. They make the crust crispy and the inside soft and airy.
Using a Pizza Stone
A pizza stone is a must-have for making artisan bread. It absorbs and spreads heat evenly, just like a brick oven. This is key for a crispy crust. Here’s how to use a pizza stone:
- Preheat your oven to 475°F (245°C) with the pizza stone inside. This ensures the stone reaches optimal temperature.
- Dust your peel or an inverted baking sheet with cornmeal to transfer the dough onto the stone easily.
- Bake the bread on the pizza stone for 30-45 minutes until the crust turns golden brown and the bread sounds hollow when tapped.
Steam in the Oven
Creating steam in the oven is another important step. The steam keeps the dough’s surface soft, allowing for a crispy crust. Here’s how to add steam:
- Place a cast iron skillet or a baking dish on the bottom rack of the oven while preheating.
- Once the dough is placed on the pizza stone, carefully pour about one cup of hot water into the preheated skillet or dish to create steam.
- Close the oven door quickly to trap the steam inside.
- Bake as directed, allowing the steam to work its magic during the first 15 minutes.
- After 15 minutes, remove the skillet or dish of water for the remainder of the baking time.
| Technique | Steps | Benefits |
|---|---|---|
| Using a Pizza Stone | Preheat to 475°F Dust peel with cornmeal Bake for 30-45 min | Even heat distribution, crispy crust |
| Steam in the Oven | Preheat skillet Pour hot water Remove skillet after 15 min | Increased oven spring, glossy crust |
Testing Bread Doneness
Knowing how to tell if bread is done is key to making the perfect loaf. There are several ways to check if your Italian bread is fully baked and ready to eat.
- Internal Temperature: Using a thermometer is one of the most accurate ways to check. Your bread should have an internal temperature of 190-200 degrees Fahrenheit. For bread with butter, milk, or eggs, aim for 200 degrees Fahrenheit.
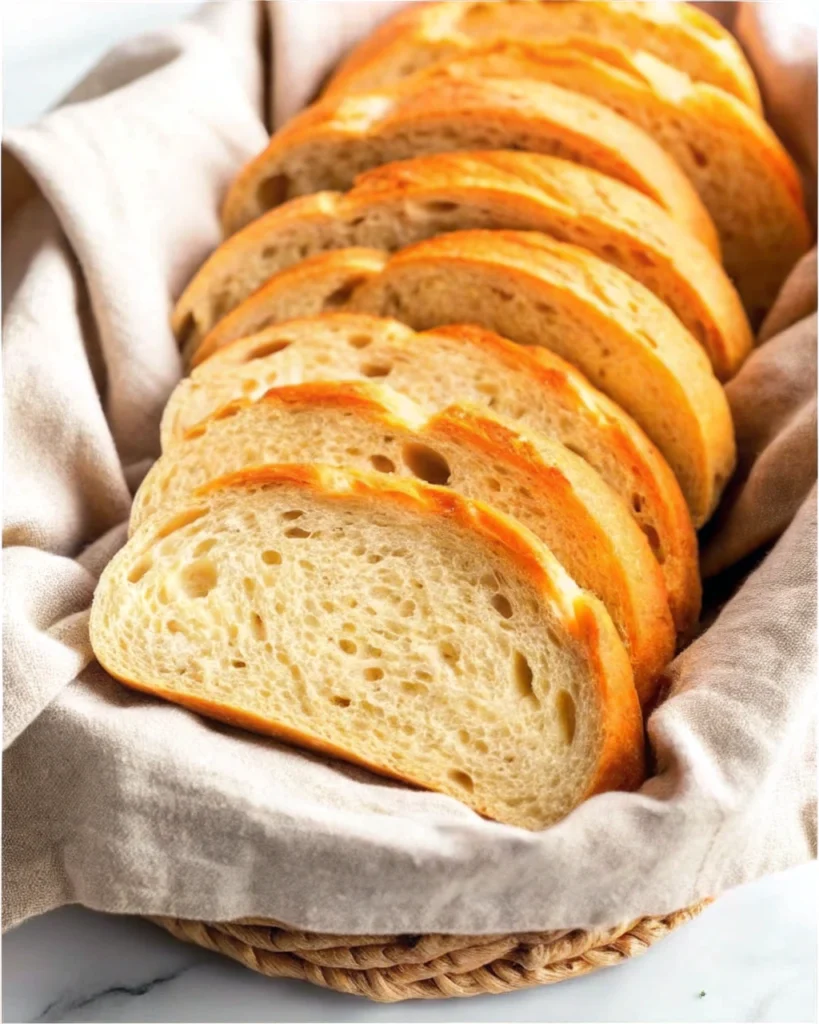
- Visual Cues: A fully baked loaf should have a golden brown crust with dark spots. This is a clear sign that your Italian bread is ready.
- Hollow Sound Test: Tap the bottom of the loaf with your knuckles. If it sounds hollow, it’s done. A dull sound means it needs more baking time.
These methods will help you figure out how to tell if bread is done. But, remember, practice makes perfect. Keep baking, and soon you’ll know the signs Italian bread is ready without a doubt.
Cooling and Storing Your Bread
After baking your Italian bread, cooling it right is key. This ensures the crust stays crispy and the inside soft. Cooling slowly is worth it for the best taste and texture.
Proper Cooling Methods
Let the bread cool on a wire rack for at least an hour. But, two or more hours is better. This lets the inside bake fully and moisture spread out.
For breads with lots of water, like whole grain loaves, rest them for 2-3 days. This boosts their flavor. Rye bread should rest, wrapped in linen or a towel, for one to two days before cutting.
Storage Tips
Storing Italian bread right can make it last longer. A cooled loaf can stay fresh for one to two days at room temperature. But, in humid places, move sliced bread to the fridge to avoid mold.
Use a sealed plastic bag to keep moisture in, especially in dry places. Bread can stay fresh for up to four days at room temperature. To refresh stale bread, reheat it to 140°F (60°C).
Freezing for Later
Freezing your bread is a great way to keep it longer. Slices can stay good for at least a month. But, they might last even longer.
To save space and prevent sticking, freeze slices in layers in a bag. The Breville Smart Toaster is great for reheating frozen slices. You can freeze fully baked Italian bread for up to three months.
Serving Suggestions
Italian bread is perfect for many meals. Here are some Italian bread serving ideas to make your meals special and impress your guests.
Pair with Traditional Italian Dishes: Serve your bread with classic Italian dishes like pasta, risotto, or minestrone soup. The crispy crust and soft inside are a great match.
Sandwiches and Paninis: Turn your bread into tasty sandwiches or paninis. Try a Caprese sandwich with fresh mozzarella, tomatoes, and basil. Or, go for a gourmet option with prosciutto, arugula, and fig jam.
Simple Enjoyment: Sometimes, the simplest way is best. Enjoy warm bread with butter, balsamic vinegar, or garlic and herbs for homemade garlic bread.
With Appetizers and Dips: Sliced Italian bread is great with many appetizers and dips. Try it with antipasto, bruschetta, or creamy dips like hummus or artichoke dip.
These Italian bread serving ideas offer many ways to enjoy your bread. From classic pairings to creative sandwiches and simple pleasures, you now know how to serve Italian bread for any occasion.
FAQs
What are the best types of flour to use for making authentic Italian bread?
For authentic Italian bread, use Tipo 00 or Tipo 0 flour. These flours have a finer grind and more protein. This makes the bread’s structure and texture better.
Which types of yeast are recommended for homemade Italian bread?
Active dry yeast and instant yeast are great for Italian bread. They help the dough rise well and add flavor.
What additional ingredients do I need for a traditional Italian bread recipe?
You’ll need water, salt, and sometimes olive oil or sugar. These ingredients add flavor and texture to the bread. If you’re looking for complementary pairings, check out our guide on shrimp pairings & side dishes for delicious meal inspiration.
How should I mix dough for Italian bread?
Mix the dough until it’s just combined. Then, knead it by hand or with a stand mixer until it’s smooth and elastic.
What is the importance of the stretch and fold method in Italian bread making?
The stretch and fold method develops the gluten. This gives the bread a chewy texture and an even crumb.
How long should I perform the stretch and fold technique?
Do the stretch and fold every 30 minutes for 2 hours. This develops the gluten network well.
Can you provide a visual guide to the stretch and fold technique?
Yes, many online tutorials and videos show the stretch and fold method. Look for ones that explain it step-by-step.
What is the first rise or overnight method?
The first rise, or overnight method, lets the dough rise slowly in the fridge overnight. This slow rise enhances the bread’s flavor.
How should I shape the dough for Italian bread?
Shape the dough into a loaf by gently tucking the edges. Create surface tension on the top. This helps the bread rise evenly and have a uniform shape.
Why is ensuring evenness important when shaping dough?
Evenness ensures the bread bakes evenly. This prevents dense or doughy spots in the final loaf.
What should the second proof look like for Italian bread dough?
During the second proof, the dough should nearly double in size. It should be slightly puffy to the touch, showing it’s ready for baking.
What is the ideal proofing temperature for Italian bread dough?
The ideal proofing temperature is 75-80°F (24-27°C). This temperature ensures the dough rises at a consistent rate.
How should I prepare the oven for baking Italian bread?
Preheat the oven to the right temperature. Use a baking stone if you have one. Make sure the oven is hot enough for a crispy crust.
Are there easy, traditional Italian bread recipes available to follow?
Yes, many online resources and cookbooks offer easy, traditional Italian bread recipes. Look for ones with good reviews and detailed instructions.
How can I achieve a crispy crust on my Italian bread?
Use a pizza stone and introduce steam in the oven for a crispy crust. The steam prevents the crust from getting too hard too fast.
How can I tell if my Italian bread is done baking?
The bread is done when it’s deep golden-brown and sounds hollow when tapped. You can also check with a thermometer; it should read 200-210°F (93-99°C).
What are proper cooling methods for Italian bread?
Cool the bread on a wire rack. This lets air circulate around the loaf, keeping the crust from getting soggy.
How should I store homemade Italian bread?
Store the bread in a bread box or wrap it in a cloth or paper bag. Avoid plastic bags as they can make the crust soft.
Can I freeze Italian bread for later?
Yes, you can freeze Italian bread. Wrap it tightly in plastic wrap and aluminum foil to prevent freezer burn. Thaw at room temperature before reheating.
What are some serving suggestions for homemade Italian bread?
Italian bread is great with olive oil and balsamic vinegar. It’s also good as a side for soups and stews, or in sandwiches. It’s excellent for making bruschetta.
Conclusion
Making Italian bread at home is rewarding. It brings freshness and nutrition that store-bought bread can’t match. This guide has walked you through choosing ingredients, mixing dough, and baking.
The stretch and fold method is key for a strong gluten structure. This is crucial for the right texture. First and second rises are also important for yeast activity. And, keeping the temperature just right is essential.
Our recipe uses organic white spelt flour for a crispy crust and soft inside. With practice, you can enjoy the taste and texture of homemade Italian bread. It’s a joy to make something special in your kitchen. Enjoy your homemade loaf and let it add warmth to your table.